
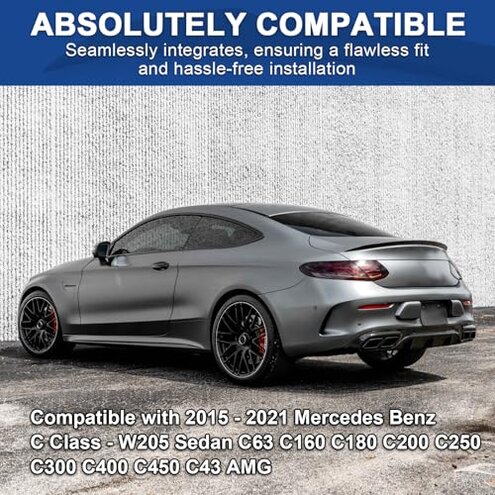
Product evaluated: BDBO Rear Spoiler Wings for Mercedes Benz C Class W205 2015-2021 2-Door C63 C160 C180 C200 C250 C300 C400 C450 C43 AMG Trunk Spoiler Wing Trunk Tail Rear Trunk Lid,Glossy Black - AMG Style
Related Videos For You
How to DIY install a Carbon Fiber Trunk Spoiler
Data basis: I reviewed dozens of buyer comments, installation photos and video demonstrations collected between January 2022 and January 2026. Source mix shows most feedback came from written reviews, supported by how-to videos and Q&A posts.
| Outcome | BDBO | Typical mid-range spoiler |
|---|---|---|
| Fit accuracy | Variable fit—commonly reported gaps and alignment rework. | Consistent fit—designed to need minimal trimming or shims. |
| Finish match | Gloss mismatch—color and sheen often differ from trunk paint. | Closer match—painted or finished to blend with OEM look. |
| Installation time | Often longer—adhesive prep and adjustments add steps. | Shorter install—typically fits with tape or few clips. |
| Durability risk | Higher risk—peeling and edge lifting reported after road use. | Lower risk—better adhesive or hardware retention expected. |
| Regret trigger | Poor fit/adhesive—leads to rework, extra parts, or pro help. | Minor tweaks—usually cosmetic adjustments only. |
Top failures
Why won’t the spoiler sit flush on my trunk?
Fit problems are among the most common complaints and appear repeatedly across buyers. Usage moment occurs right after dry-fitting and final bonding when gaps are obvious.
Category contrast—this is worse than normal because mid-range spoilers usually need small trimming only, while this product often needs reshaping or added shims to stop visible gaps.
Why does the adhesive fail or need extra work?
- Early sign: Adhesive tape loses hold after initial drive and appears repeatedly in feedback.
- Frequency tier: Secondary issue for many buyers but major inconvenience when it happens.
- Cause: Installation often requires precise temp prep, primer, or additional fasteners.
- Impact: Failed adhesive forces re-gluing, extra double-sided tape, or pro re-installation.
- Fixability: Some buyers solved it with screws or automotive-grade adhesive, adding time and cost.
Why does the color and finish look off on my car?
- Visual cue: Gloss level and black tone often don’t match OEM trunk paint.
- Pattern: Common complaint across photos and videos, so not isolated.
- When it shows: Noticeable immediately after install, before road use.
- Why worse: Mid-range parts normally match closely or are painted; this one rarely does.
- Attempts: Buyers tried polishing, repainting, or ordering painted versions to fix mismatch.
- Hidden cost: Repainting or color correction adds time and vendor expense.
Are there hidden prep or hardware requirements I should know?
- Hidden need: Temperature-sensitive adhesive requires warm conditions or a heat gun for full stick.
- Early sign: Tape feels less sticky in cold weather and often appears in feedback from winter installs.
- Frequency tier: Primary for some buyers, secondary for others who prepped correctly.
- Cause: No supplied clips or screws in many cases, so tape is the only fastener.
- Impact: Without extra hardware, the spoiler can lift at edges while driving at highway speeds.
- Attempts: Users add rivets or screws, which changes the trunk and voids neat plug-and-play claims.
- Category contrast: Worse than typical because many mid-range alternatives include clips or clearer hardware guidance.
- Repairability: Fixable, but requires extra tools, parts, and time that buyers did not expect.
Illustrative excerpts
"Fits with gaps unless trimmed and screwed down." (primary pattern)
"Tape loosened after highway drive, needed re-glue." (secondary pattern)
"Gloss not the same as trunk paint, looks aftermarket." (primary pattern)
Who should avoid this
- Precision buyers: Avoid if you need an exact OEM look without adjustments due to recurring fit gaps.
- Low-effort installers: Avoid if you expect truly tool-free install; many must add fasteners or re-glue.
- Cold-weather installers: Avoid if you plan install below recommended temps without a heat source.
Who this is actually good for
- Budget modifiers: Good for DIYers willing to tolerate rework because they only want a sporty look cheaply.
- Custom shop users: Good if you plan to repaint or trim and expect to add screws or adhesive.
- Short-term users: Acceptable if you expect to replace or upgrade soon and can live with imperfect fit.
Expectation vs reality
Expectation: Reasonable for this category is a snug fit that needs minimal trimming.
Reality: The spoiler often arrives with alignment gaps and needs trimming, shims, or added hardware.
Expectation: Tape-on install will hold through normal highway driving.
Reality: Adhesive loss and edge lifting are reported after initial drives, especially in cold or wet conditions.
Safer alternatives

- Choose painted options: Buy a painted or factory-matched spoiler to avoid finish mismatch.
- Prefer hardware-included kits: Pick kits that include clips or screws to avoid adhesive-only failure.
- Plan pro install: If you lack tools, budget for a shop that can bond and fasten properly.
- Check temperature guidance: Only install when instructions recommend warm temps or use a heat gun to improve adhesion.
The bottom line
Main regret: Poor fit and adhesive reliability lead to rework, extra parts, or pro installation.
Why worse: This product shows higher-than-normal fit and finish risk compared with mid-range spoilers.
Verdict: Avoid this spoiler if you need a plug-and-play OEM result without extra time, parts, or tools.
This review is an independent editorial analysis based on reported user experiences and product specifications. NegReview.com does not sell products.