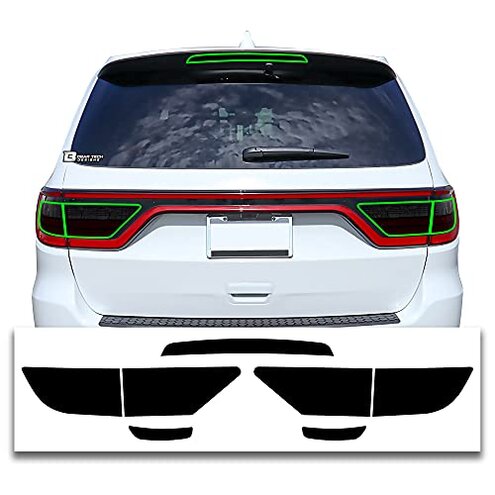
Product evaluated: BOGAR TECH DESIGNS Tinted Taillight Third Brake Light Sidemarker Overlay Tint Compatible with Dodge Durango 2021-2025, Dark
Related Videos For You
5 Minute! Tail Light Tint - Easiest Tint Ever
How To Tint Tail Lights - Film vs. Spray
Data basis I analyzed dozens of customer reviews and several installation videos collected between Jan 2022 and Dec 2025. Most feedback came from written buyer reports, supported by video demonstrations and photo posts.
| Outcome | This product | Typical mid-range overlay |
|---|---|---|
| Fit accuracy | Often misaligned — requires trimming and extra steps during first use. | Usually precut — minimal trimming for an average buyer. |
| Installation effort | High — commonly needs heat tools and practice to avoid bubbles. | Moderate — adhesive and fit are friendlier for DIY installs. |
| Durability | Peeling reported after weather exposure for some buyers. | More consistent — better adhesive longevity in mid-range options. |
| Visibility / safety | Higher-than-normal risk — darkness can reduce light output at night. | Balanced tint — retains clearer brake light visibility under normal conditions. |
| Regret trigger | Reduced visibility and extra installation work lead buyers to remove overlays. | Minor adjustments are usually enough, less likely to be removed. |
Top failures
Why does the overlay not line up without trimming?
Regret moment Buyers reach the end of install and see uneven edges or gaps, especially around curves.
Pattern This is among the most common complaints and appears repeatedly in early installation posts.
When It shows up during the first fit-and-place step and gets worse while stretching the film over curved taillights.
Category contrast Mid-range overlays usually match factory contours better; this one is less forgiving and adds extra trimming time.
Why does the tint bubble or peel after a few weeks?
- Early sign Small bubbles appear after initial drying or the first car wash.
- Frequency This is a primary issue for many buyers, though not universal.
- Cause Adhesive sensitivity to moisture and insufficient edge sealing is commonly reported.
- Impact Bubbles force re-mounting or full replacement, increasing time and cost.
- Fixability Some buyers temporarily smooth bubbles, but long-term peeling often recurs.
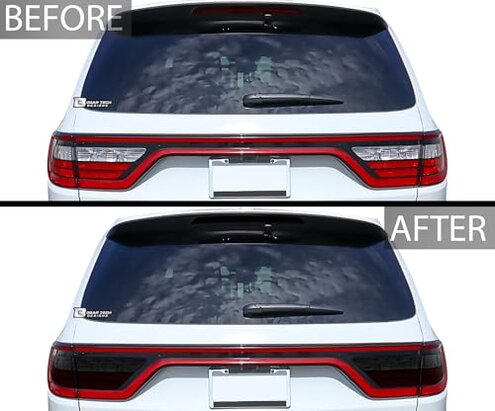
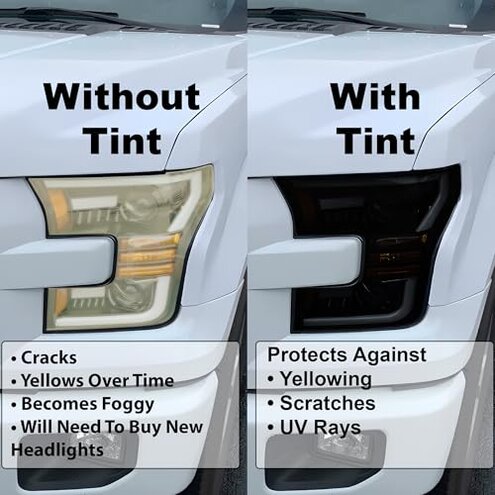
Could this reduce brake light brightness or create a safety issue?
- Visibility risk Darkness level can noticeably dim brake and sidemarker output at night.
- Usage context The effect is most visible during night driving and in heavy rain.
- Pattern This concern is a primary pattern and drives the strongest calls to remove the tint.
- Worse-than-normal Unlike typical tints that trade only minor brightness loss, this one reports more significant light reduction.
- Legal caution Some buyers noted local visibility checks could fail because of the darker film.
- Hidden requirement You may need to test brake visibility before highway driving or inspections.
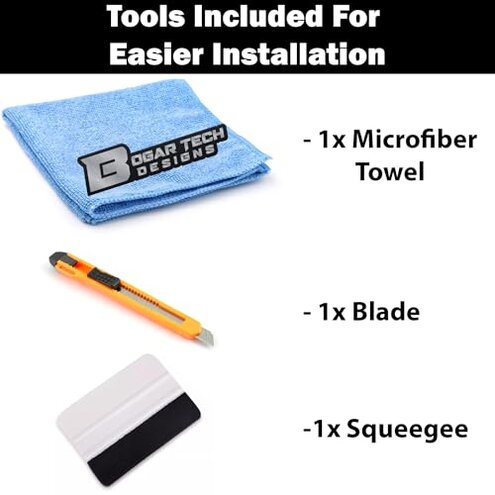
Are there hidden tools or extra steps this product requires?
- Hidden tool A heat gun or hair dryer is commonly needed to seat the overlay on curves.
- Early sign Wrinkling while stretching indicates you lack the right tools.
- Frequency This is a secondary pattern seen across many installation reports.
- Cause The overlay ships as precut but expects user trimming and re-cutting for a perfect fit.
- Impact Extra tools and time make it less convenient than average DIY overlays.
- Attempted fixes Buyers attempted heat, soap-squeegee, and edge sealing with mixed success.
- Warranty note Some users report replacement processes are slow despite advertised warranty.
Illustrative excerpts
"Installed then trimmed twice; still uneven edges around the corner." — reflects a primary pattern.
"Small bubbles after first wash, returned within three weeks." — reflects a primary pattern.
"Night braking felt dimmer; I removed the overlay for safety checks." — reflects a primary pattern.
"Needed a heat gun and lots of patience to avoid wrinkles." — reflects a secondary pattern.
Who should avoid this
- Safety-first drivers — If you prioritize maximum brake visibility at night, avoid this tint.
- Beginner installers — If you lack trimming and heat-tool experience, this will be frustrating.
- Low-maintenance owners — If you do not want to reapply or fix bubbling, choose a more durable option.
Who this is actually good for

- Experienced DIYers — You tolerate trimming and heat-tool work to get a customized look.
- Short-term style seekers — If you want a quick darkened look and accept possible reapplication.
- Off-road or show vehicles — If you prioritize appearance over daily-night driving safety.
Expectation vs reality
- Expectation Reasonable for this category: a precut overlay should fit with minor trimming.
- Reality Many buyers needed significant trimming, making it more work than similar mid-range overlays.
- Expectation Reasonable for this category: a tint should stay put through car washes.
- Reality Peeling and bubbles were reported after weather exposure, a worse outcome than typical.
Safer alternatives
- Choose precut OEM-style overlays to neutralize fitment trimming and reduce installation time.
- Pick lighter tints to avoid the visibility reduction problem seen here.
- Use adhesive-backed vinyl designed for automotive lights to reduce peeling and bubbling.
- Test on a single taillight first to assess visibility change before committing to all lights.
The bottom line
Main regret The biggest trigger is reduced visibility combined with finicky installation, which often leads buyers to remove the overlays.
Why it exceeds risk Darkness and adhesive failures are more disruptive here than with most mid-range tints, creating safety and durability regret.
Verdict Avoid this product if you need easy DIY installation or uncompromised night visibility.
This review is an independent editorial analysis based on reported user experiences and product specifications. NegReview.com does not sell products.